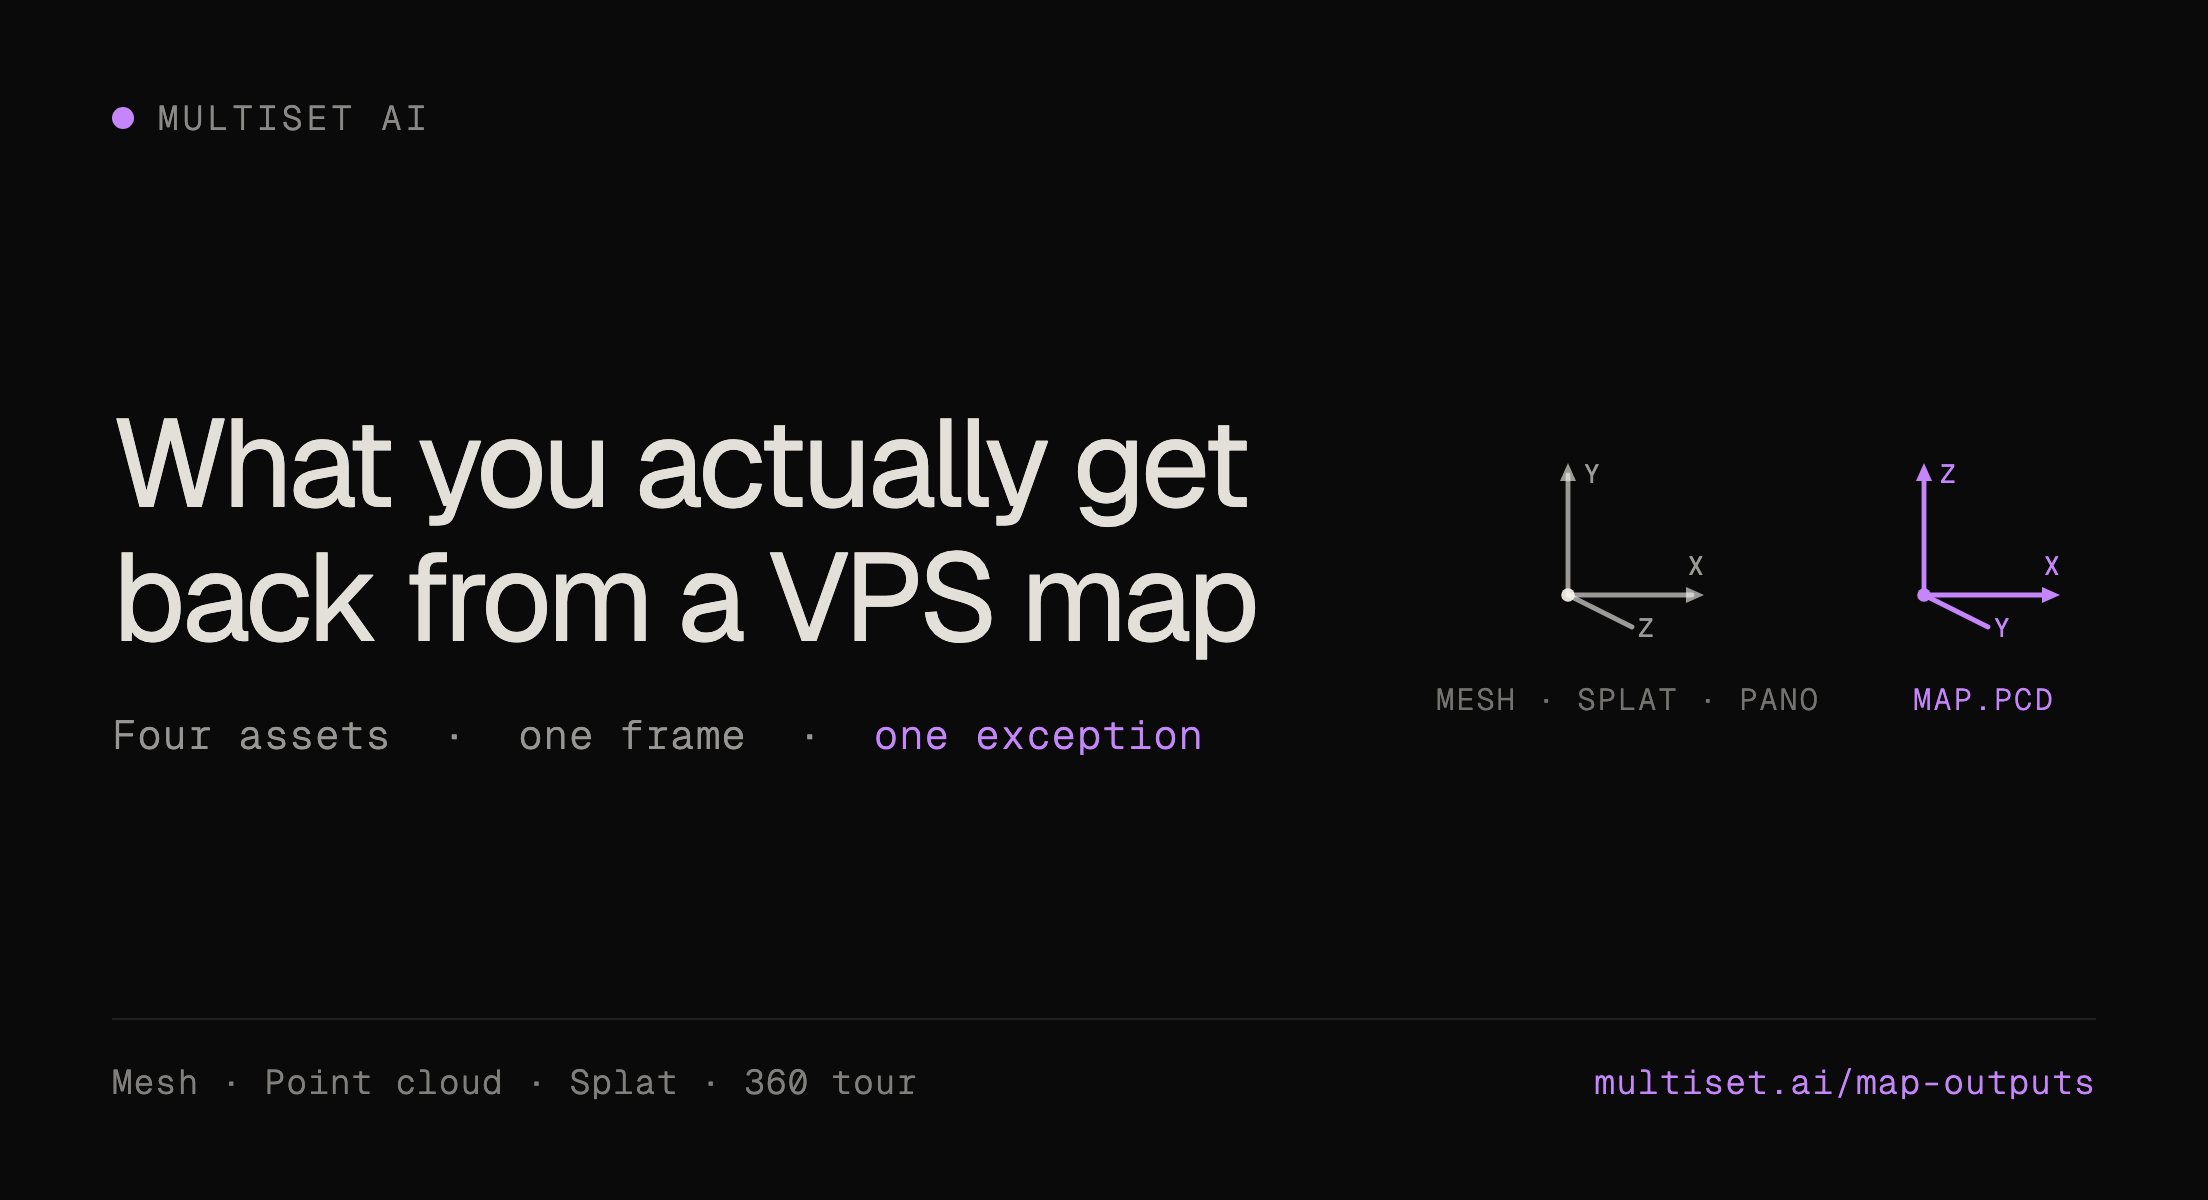
What you actually get back from a VPS map. Four assets, one frame, one exception. Two coordinate triads show the map frame with plus Y up against map.pcd with plus Z up.

Spatial Intelligence

·
September 2, 2026

What You Actually Get Back From a VPS Map

Every MultiSet map returns a mesh and a point cloud, plus a Gaussian splat and a 360 tour on request. What each one is for, and the coordinate frame trap that costs an afternoon.
Shadnam Khan
MultiSet AI

Teams ask about accuracy for weeks. They ask what the map actually returns on the morning they start integrating.

Every processed MultiSet map publishes a mesh and a point cloud. Ask at upload and it also publishes a Gaussian splat and a navigable 360° tour of the same space.
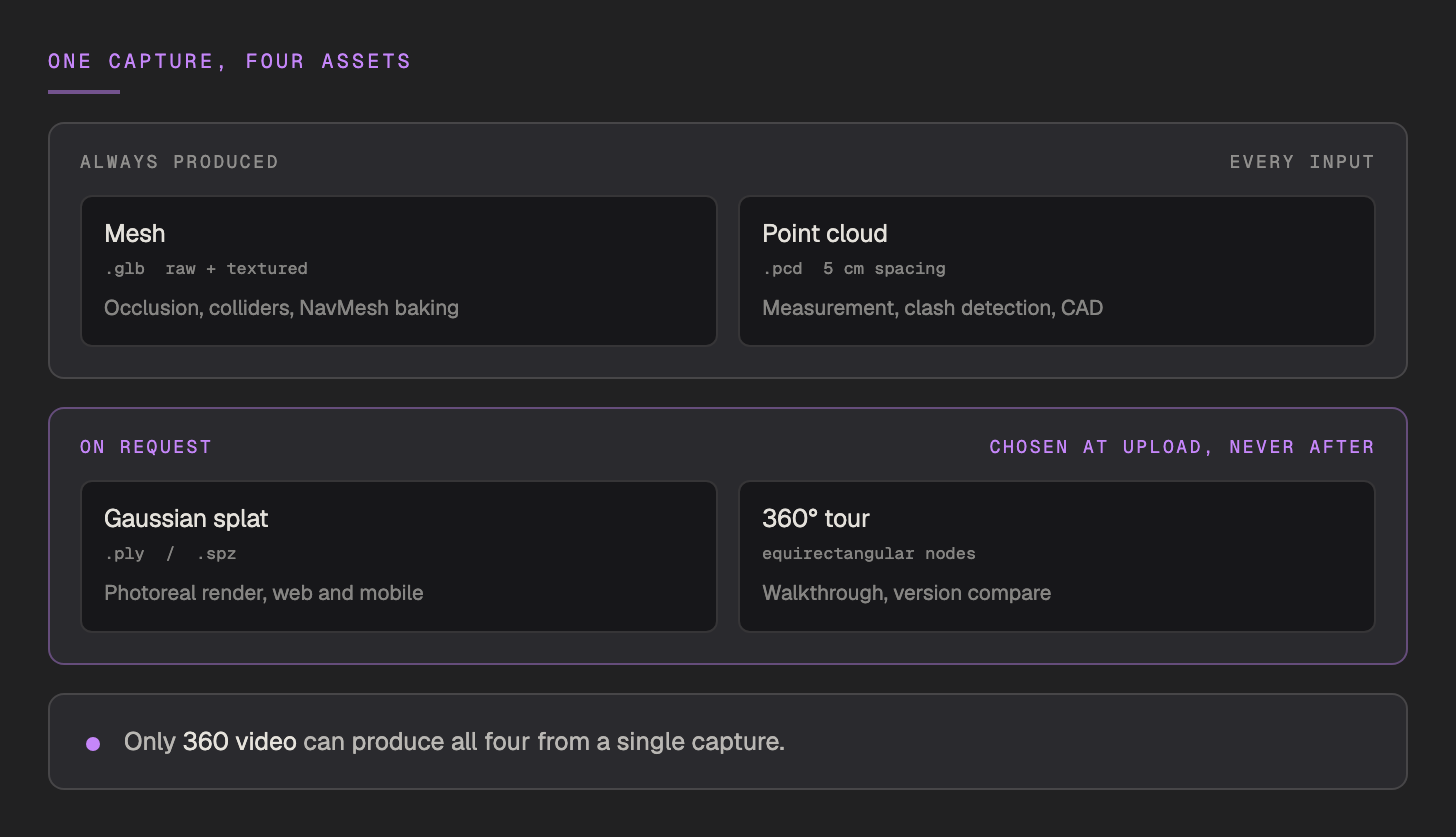
Two groups of output assets. Always produced from every input: mesh as raw and textured GLB for occlusion, colliders and NavMesh baking, and point cloud as PCD at 5 cm spacing for measurement, clash detection and CAD. On request, chosen at upload and never after: Gaussian splat as PLY or SPZ for photoreal render, and a 360 degree tour of equirectangular nodes for walkthrough and version compare. Only 360 video can produce all four from a single capture.

Those are ordinary files. GLB opens in Blender. PCD opens in CloudCompare. None of it needs our renderer.

The frame is the part that matters

Three of the four sit in the map’s local frame: origin at (0, 0, 0), +Y up, metric scale. A VPS query returns poses in that same frame, so anything you align to the mesh in the editor lands in the same physical spot at runtime.

The point cloud is the exception.
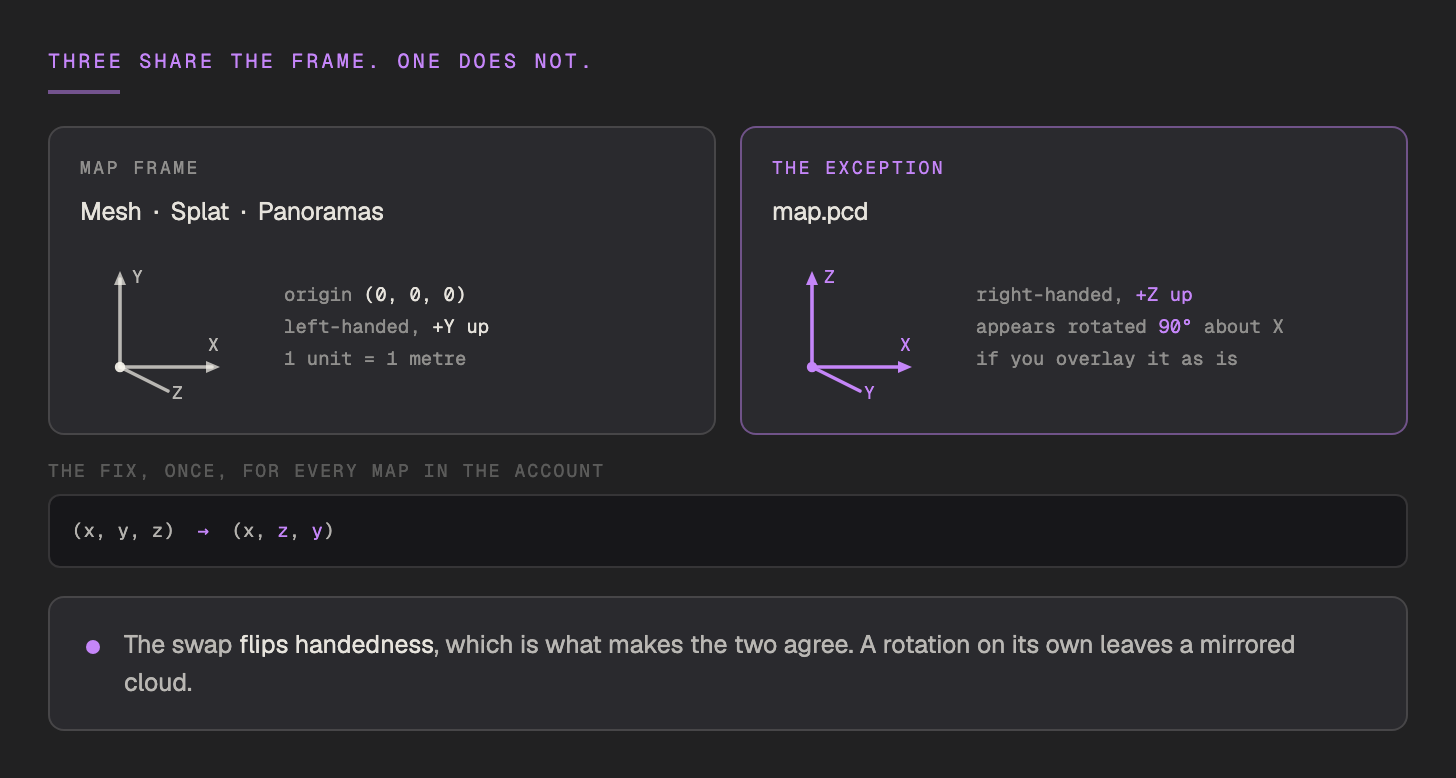
Two coordinate triads side by side. The map frame holding mesh, splat and panoramas is left-handed with plus Y up, origin at 0 0 0, one unit equals one metre. The exception, map.pcd, is right-handed with plus Z up and appears rotated 90 degrees about X if overlaid as is. The fix is to map x y z to x z y, which flips handedness; a rotation on its own leaves a mirrored cloud.

One conversion works across every map in your account. Cheap once you know. Expensive the first time.

Decide the optional assets at upload

The splat and the tour are opt-in, and the flag is read once, when the map is created.
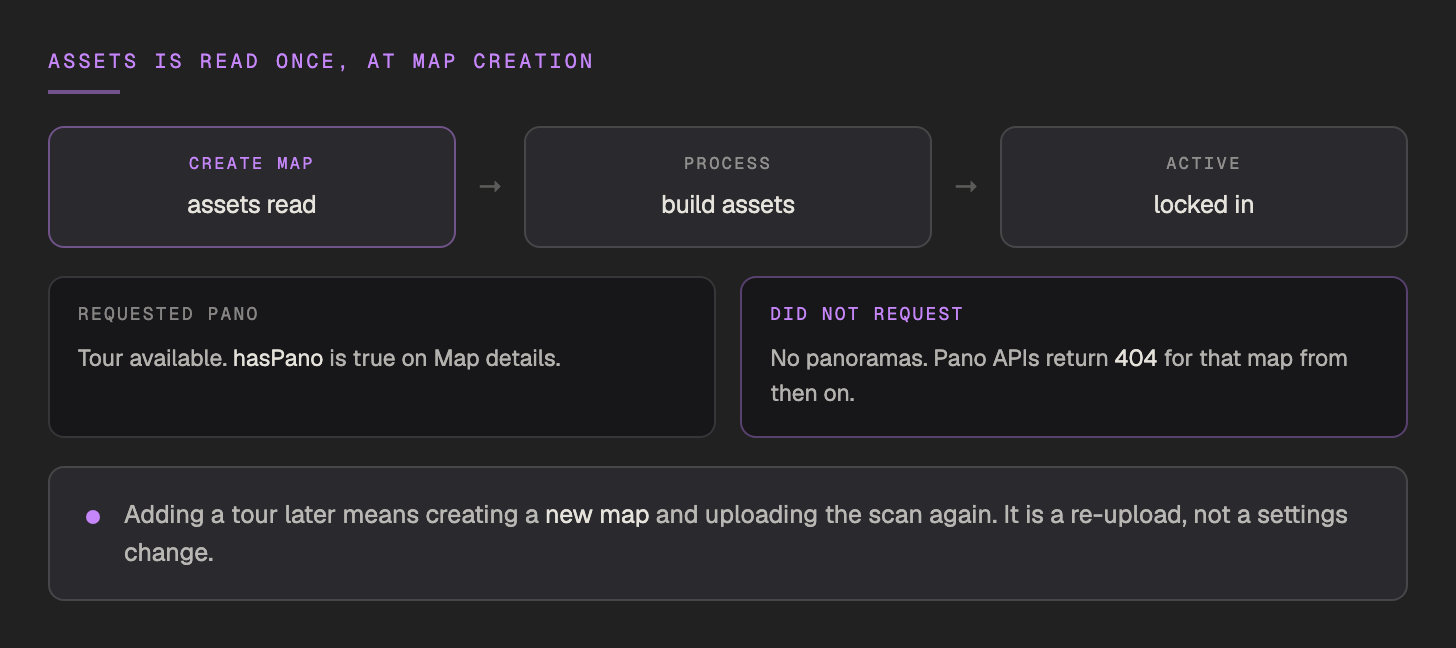
A three step flow: create map, where the assets flag is read, then process, then active and locked in. Two branches follow. If pano was requested the tour is available and hasPano is true on Map details. If it was not, there are no panoramas and the Pano APIs return 404 for that map from then on. Adding a tour later means creating a new map and uploading the scan again.

That one costs a re-upload rather than a settings change, so it is worth deciding before you press go.

What stays, and what is yours

Localization runs on the map’s feature data. The output assets are the visual half, and they are yours: preview them, download them, load them into your engine, your BIM tool, or a viewer you write yourself.
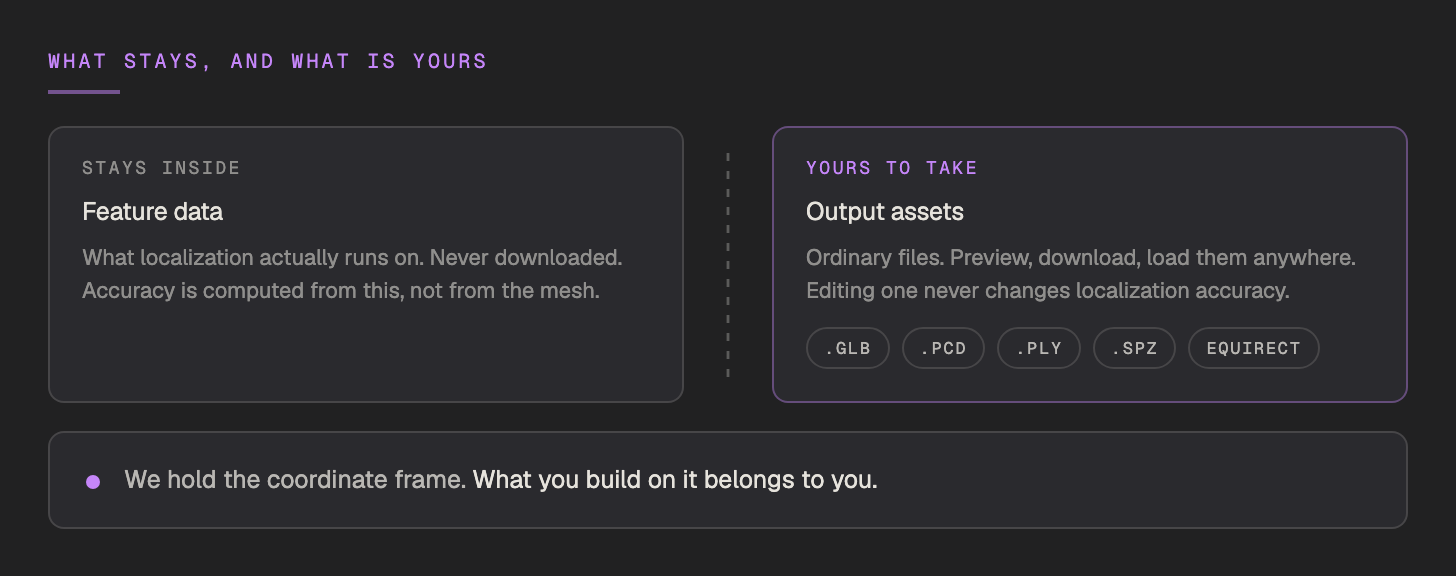
A dashed boundary splitting two zones. Inside stays the feature data, what localization actually runs on, never downloaded, and the source of accuracy rather than the mesh. Outside are the output assets, ordinary files in GLB, PCD, PLY, SPZ and equirectangular formats that can be previewed, downloaded and loaded anywhere, where editing one never changes localization accuracy.

We hold the coordinate frame. What you build on it belongs to you.

The full input-to-asset matrix, including which capture types produce which assets and which cannot, is on map outputs.